Adhoc Data Upload
- 3 Minutes to read
Adhoc Data Upload
- 3 Minutes to read
Article summary
Did you find this summary helpful?
Thank you for your feedback!
After registering, you will be on the home page of the application. You can see the "Upload" option on the sidebar to your left side of the screen.
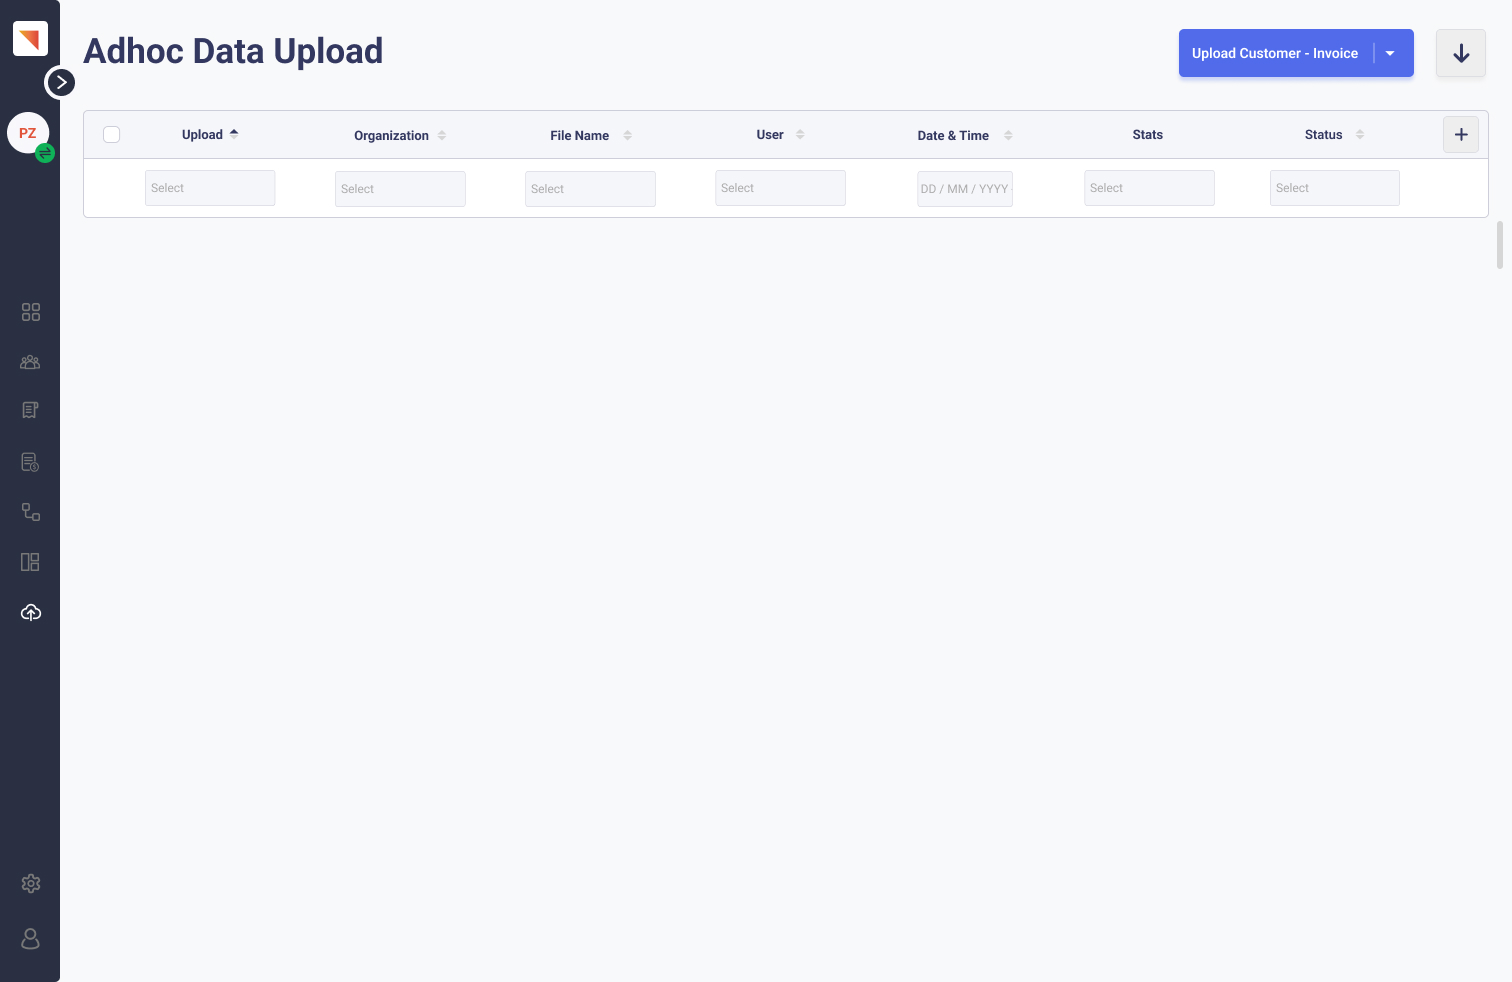
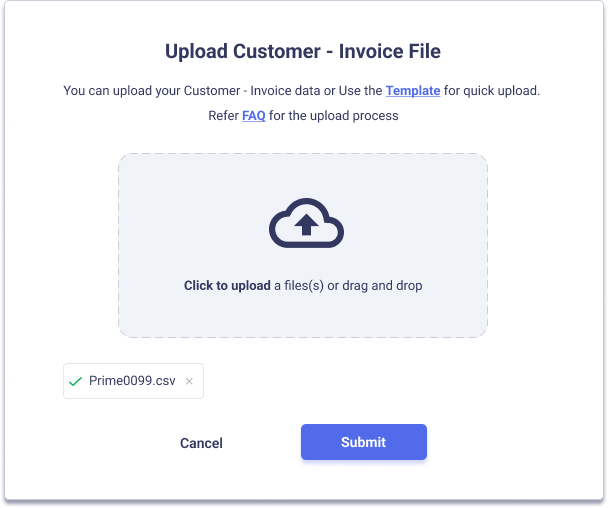
Click the "Upload" option and the Adhoc Data Upload screen will appear. In the top right corner, you can find the "Upload - Customer Invoice" button. Click that button and the below pop-up will appear.
Uploading the data
There are two ways by which you can upload your account data.
1. In the pop-up box, you can see the word Template highlighted. You can download the Maxyfi Template and alter the data according to the Maxyfi Template. After that, you can upload the data and select "Maxyfi Template Mapping" from the top right corner of the pop-up for mapping your data. The other way of uploading your data is,
2. Click on the "Click to upload a file(s) or drag and drop" to upload your form of accounts data. Then you will receive the below screen from where you can map (one-time mapping) your data to the Maxyfi format.
(1).png)
In this window, you can see four columns mentioning "Upload File Columns", "First Row Data", "Data Format" and "Mapping with System Fields".
The first column will have the title that you have given to your data.
The second column will have the data of the first row of the file you have uploaded.
The third column is not for all the fields in your file, but some fields like Date Format, Currency Type, etc.
The fourth column is the mapping column from which you need to map the title with the Maxyfi account field format.
In the Mapping with System Fields column, you need to arrange the fields that exactly match the fields in Upload File Columns. Once done, click on the "Next" button and you will move to the next step. Here, you will have a pop-up that allows you to do a default mapping for the mandatory fields.
You can see three columns in this tab: Mandatory System Fields, Purpose, and Default Value. In the "Mandatory System Fields", you can find the Mandatory fields like Currency Code as given below in the image. The second column will have the purpose of that field in the first column. The third column will have the default value of the field in the first column.
For example, for the currency code, we can select "USD" from the options in the "Default Value" column. After entering, click on the "Next" button.
You can also save this as a template by clicking on the "Save mapping for future reference" checkbox and giving a name for the template before clicking on the "Next" button.

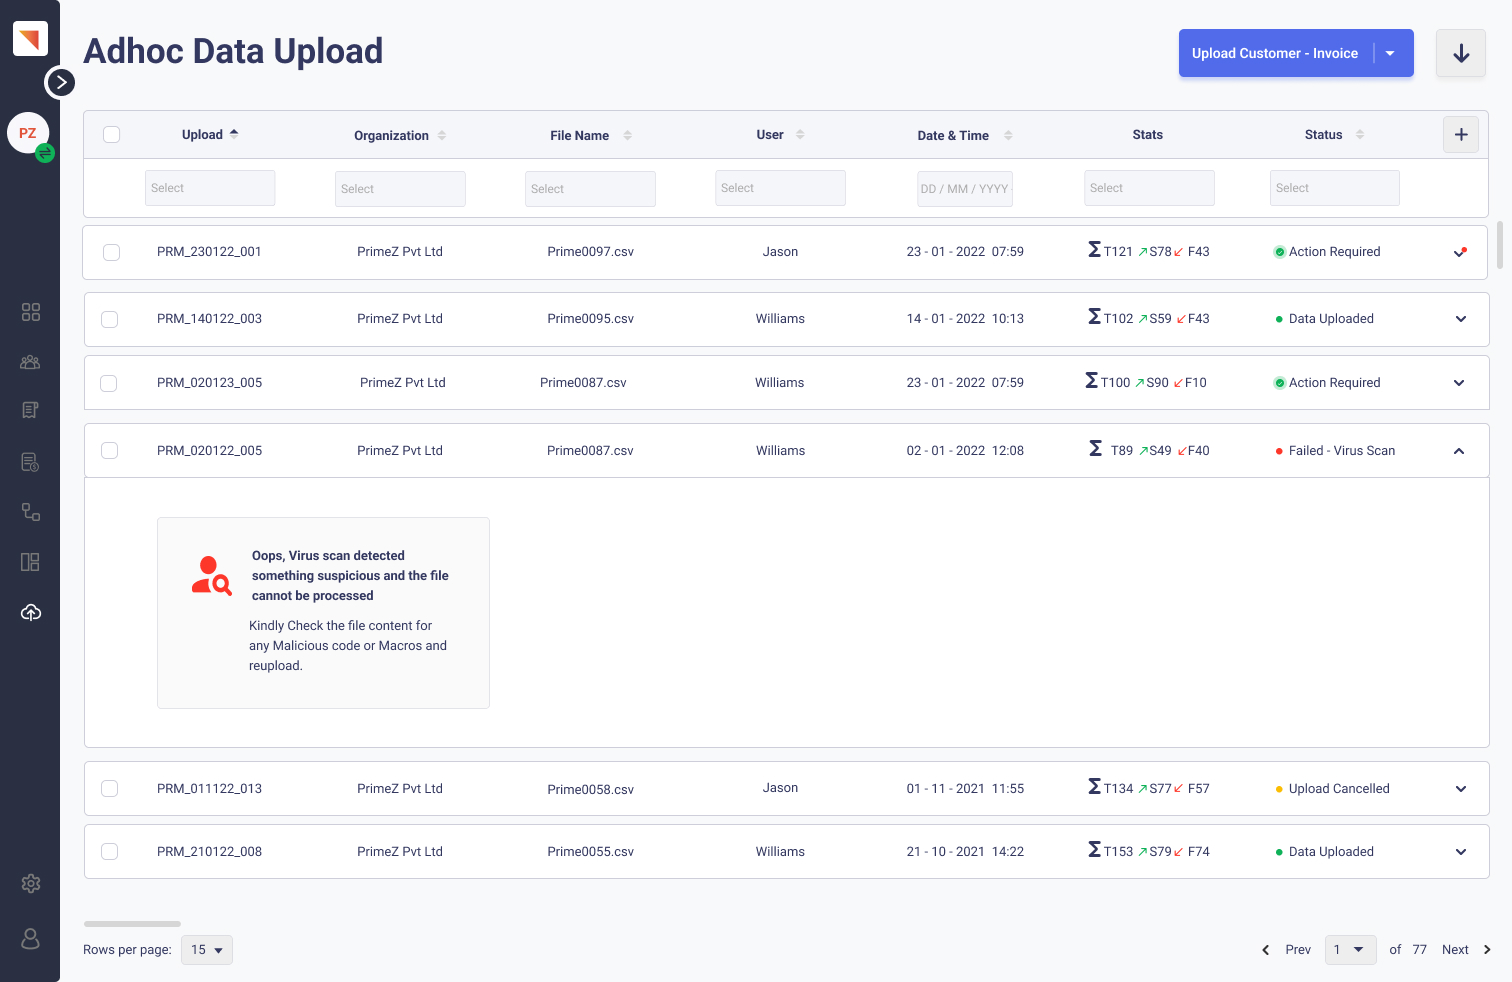
Data Status
After uploading, the below screen with all your Accounts Receivable data will appear. You can see all the details simply and understandably. To the right side of the data, you can see the Status column. The status of the file uploaded will be visible there. There are only four types of status in uploading the data. They are

1. Data Uploaded
If the data is uploaded without any issue, then the status will be marked as "Data Uploaded".
2. Action required
.jpg)
If the status is marked as "Action Required", then you have to check for the files that show errors while uploading. After that, you can cancel the upload or you can upload the file anyway.
3. Upload Canceled
After the second step, a pop-up will occur asking to continue the upload or to stop the upload. If you select continue, the file will be uploaded successfully and the status of the file will be changed to "Data Uploaded". If you cancel the upload, then the status will be updated to "Upload Canceled".
.jpg)
4. Failed - Virus Scan
The upload will not start if the data you are trying to upload is affected by a virus. If this happens, your data upload will be stopped and the status will be changed to "Failed - Virus Scan".
Was this article helpful?